

All Might (Gatling) Guide
Guide developed and supervised by: Yoboispongi (PS)Helped with the development: ZOL (Steam), Crafty (Switch), D4RKL0RD9272 (Xbox)
Last Update: -
All Might (Gatling) is a rapid/strike/support hybrid character that can fight at close, medium, and long distances. He is a walking tank when his alpha is fully ramped up and can revive his teamates with his special action and turn the tide of battle.
As one of the bigger characters in the game that plays an event bigger role to their team you will often find yourself being focused alot, but that's not to much of a problem because of your insanely high close and far ranged damage. Combined with the fact of having multiple movement options you can truly dominate the battlefield.
Best Map: Chaos City


Alpha Skill - Taxes Smash Gatling
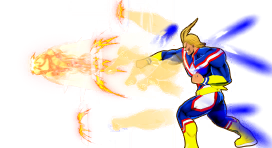
All Might begins punching the air, creating miniature shockwaves that damage opponents and pierce through multiple foes. As All Might continues punching his alphas begin firing out faster and faster until he is punching you at Mach 5.
This move is like no other because it has a progressive wind up that only happens when using the move itself, not like moves like AFO Charged Alpha where you merely hold the button and release it to get the empowered version.
This move also has one fatal flaw: Vunerablility. All Might has armor during this move, however that can be more of a downside than an upside. Because of said armor he is less prone to being blown away by moves which means as long as you’re punching you’re gonna be dying a lot faster if someone’s shooting at you.
One neat thing about this move though is that All Might can use this in conjuction with his melee string in a technique called “Rapid-Gatling”, where All Might uses his melee and cancels into his alpha during the bit where he begins rapid punching. This makes it to where you can get max speed punches instantly without having to do the windup.
Damage for this move per shot is terrible, since he can only do about 30 something per shot at max, however the rate at which he fires them makes it to where he can dish out incredible amounts of damage with relative ease.
A common mistake beginning Rapid Might players do is use this move up close. This is not a move you want people seeing you do. They will shoot at you and you will die. You want to be coming into a fight doing this from a distance so it takes time for people to see you and it gives you time to dish out ridiculous amounts of damage while they are confused and scared. Also it’s good to use this move to finish off opponents incredibly fast.
Beta Skill - Carolina Smash
All Might does a crosschop that launches an air shockwave that pushes back the opponent while being capable of hitting multiple targets by piercing through them. Hold the button for All Might to charge forward in one direction ending it with a crosschop.
It's a pretty simple move that gives All Might his rapid movements while also being one of his main sources of attack, it's specially good thanks to the projectile version having a DP of 250 meaning you can do two to fully knock the enemy.
The projectile version's collision hitbox is smaller than its damage hitbox, which means that you can hit opponents hiding behind a corner or a wall, as the sides of the projectile don't have collisions so it can squeeze its way in small spaces. It can also pierce through opponents, being able to hit more than one.
The hold version is slightly more complex (and also slightly buggy due to the charge forward some times dropping before the follow up) the ending part has just as much DP as the tap version however the charge forward has a DP value of 50 itself which can add up. It is capable of being cancelled before the ending into another beta meaning you can keep going while also being able to fly in a zigzag. This version however doesn't allow for any follow-up after.*
As a mobility tool, it does a fantastic job, keeping your momentum and allowing you to keep moving forward at high speed, ideal for chasing or running away.
In conclusion probably the best move on his kit due to how versatile it is and thanks to it's pretty good cooldowns. *(Certain tunes like Electrification if triggered allow you to follow up with all moves except for a charged beta as it will max out the DP before connected the slash)
Gamma Skill - Arizona Smash

All might gets into a leaping stance and grabs his opponent, leaping up into the air and slams his opponents down for massive damage (one of the highest in the game for a single-instance move) and dealing the same amount of damage to enemies inside the move's AoE. You can also displace the grabbed target by moving before you finish the move, which you can use to move them closer/farther away from your teammates, move the enemy into the Poison Mist, or just to make sure you land the move on another enemy/enemies too.
The initial start up of this move has no armor but if it connects the follow-up leap will have armor all until he slams his opponent.
The grab part of this move has 0 down power (DP) but the slam is an insta 500 which is a hard knockdown.
A little known fact about this move when using it in the air compared to the ground is that it has better tracking and farther range.
This move is also a command grab so you can cancel most moves in the game even armored ones, however the move comes out decently slow and loses priority to most moves in the game.
Special Action #1 - High Jump
All Might's jump special action is a mobility tool with decent start up time, once the startup has finish you will leap high in the air with free movement control, while in the air you can also use your alpha without canceling momentum, it helps quite alot since he can get full charge before he gets to the ground, and have an easier time hitting opponents due to the height advantage he gains. Using this ability with Ochaco Uraraka's special action will temporarily grant you infinite flight. Using this special action will fully consume your special action gauge.

Special Action #2 - Carry to Safety

All Might's other special action is a revive that is shared with both base dekus and lida. When close to a DOWNd teamate you gain the option to pick them up, while carrying the downed teamate you get armor and a speed boost until you either drop them or are knocked out of it.
The special action runs on the special action meter, that passively goes down when carrying a teamate, but it's not consumed upon reviving your teammate by putting them down. Careful when using this ability as you might accidentally use his jump special action if you aren't properly looking at your ally or close enough.

Basic Attacks
Ground Melee
-
Air Melee
-

Leveling Paths
Optimal Path
This is All Might's most optimal path as it lets him have extra movement from beta and a good amount of damage on all of his moves.
![]()
![]()
![]()
![]()
![]()
![]()
![]()
![]()
![]()
![]()
![]()
Snipemight Path
This pathing is more focused on all mights long range fighting capabilities, by increasing the damage on alpha, and giving beta more damage and an extra charge.
![]()
![]()
![]()
![]()
![]()
![]()
![]()
![]()
![]()
Upclose Path
This pathing focuses on all mights melee potential by increasing the damage of his grabs and crosschops.
![]()
![]()
![]()
![]()
![]()
![]()
![]()
![]()
![]()
Techs
For a rapid all might has decent amount of techs, with a decent amount of difficulty.
Defaul Melee Cancel
Rapid All Might can cancel the third and fourth (rush) hit of his melee string into alpha or gamma. During your melee string you can cancel it with a single alpha then melee again to to reset it, it's true on hp/gp.
Melee Cancel: Complex
All Might's third and fourth melees can also be canceled if one delays their Melee 3 while not pressing any movement inputs. Once you're performing Melee 3, you must press movement inputs to cancel the melee, and you can follow-up with alpha, beta, gamma, or more melees. The timing to perform the melee cancel is kinda tight, you must wait for a bit after Melee 2 but not for long enough that you trigger Melee 1 instead of Melee 3. You will know you did it right if you make your character move forward in the middle of Melee 3 or the Melee 4 Rush.
Special Action Cancel
You can roll out of the startup of Special action, and alpha at all phases.
Flight
When using Special Action while having Ochaco Uraraka's Special Action on, All Might can obtain infinite flight to rain down alphas from the sky, however he also becomes more vulnerable to beamers. This stance can be cancelled at any moment with beta or gamma. Something similar happens if Shota Aizawa's Special Action stops your beta.
Combos
The different ways you can combine and chain various skills for higher damage within 500 DP (Downpower). The downpower of All Might's abilities are as follows:
Alpha Skill: 45 DP
Beta Skill: 250 DP (Projectile), 50 (Hold Beta Tiny Hit), 250 DP (Hold Beta Final Hit)
Gamma Skill: 0 DP (Grab), 500 DP (Slam)
Ground Melee: 100 DP (Melee 1), 50 DP (Melee 2), 80 DP (Melee 3), 0 DP (Melee 4 Rush), 500 DP (Melee 5)
Air Melee: 100 DP
The text of the combos below will be colored by how true they are, in this case, we will define as "True" combos that, without 3rd party or tuning interference, can only be escaped/interrupted by Overhaul and/or Mirio, as those are special cases.
White Text means that part of the combo is True on both GP and HP.
Green Text means that part of the combo is True if the target is on HP only.
Blue Text means that part of the combo is True if the target is on GP only (Guardbreak hits are considered GP hits).
Red Text means that part of the combo is Untrue, and therefore the enemy can escape it.
The DMG of the following combos at max level and accounting for the character's strike role is classified under the following tags:
Basic DMG (100-149 DMG), Basic+ DMG (150-199)
Light DMG (200-249 DMG), Light+ DMG (250-299)
Medium DMG (300-349 DMG), Medium+ DMG (350-399)
High DMG (400-449 DMG), High+ DMG (450-499)
Heavy DMG (500-549 DMG), Heavy+ DMG (550-599)
Deadly DMG (600-649 DMG), Deadly+ DMG (650-699)
Beta (Projectile) -> Beta (Projectile)
NEED DESCRIPTION
Beta (Projectile) -> Beta (Dash)
NEED DESCRIPTION
Air Melee -> Melee 1 -> Melee 2 -> Melee 3 -> Alpha Rush
NEED DESCRIPTION

Melee 1 -> Melee 2 -> Melee 3 -> Melee 4 Cancel -> Alpha Rush
NEED DESCRIPTION
Air Melee -> Beta (Projectile) -> Beta (Projectile)
NEED DESCRIPTION
Air Melee -> Beta (Projectile) -> Beta (Dash)
NEED DESCRIPTION
Melee 1 -> Melee 2 -> Melee 3 -> Melee 4 Cancel -> Gamma
NEED DESCRIPTION

Beta (Projectile) -> Gamma
NEED DESCRIPTION
Air Melee -> Beta (Projectile) -> Gamma
NEED DESCRIPTION

Melee 1 -> Melee 2 -> Melee 3 -> Melee 4 Cancel (Complex) -> Beta (Projectile) -> Gamma
NEED DESCRIPTION

Melee 1 -> Melee 2 -> Melee 3 -> Melee 4 Cancel -> Alpha (1) -> Melee 1 -> Melee 2 -> Melee 3 -> Melee 4 Cancel -> Gamma
NEED DESCRIPTION


Recommended Normal & Special Tunes
Normal Tunes
Strike Slots: Present Mic > Endeavor > Strike Dabi > Strike Bakugo > Strike Kendo > Tamaki > Else
Assault Slots: Assault Endeavor > Assault Shigaraki > Assault Kirishima > Assault Young All For One > Else
Rapid Slots: Rapid Bakugo > OFA Deku > Rapid Mirio > Else
Support Slots: Overhaul > Ibara > Kurogiri > Momo > Else
Technical Slots: Technical Denki > Technical Mirio > Technical Shoto > All For One > Technical Dabi
Special Tunes
| The list of recommended special tunes (not ordered): | ||
|---|---|---|
 |
Electrification Electrification allows All Might to get high damaging combos that end with with either gamma or tap beta when guardbreaking somsone with hold beta. One of the best choices for a Technical Slot. |
|
 |
Critical Permeation Critical Permeation is a get out of Jail free card when All Might takes too much damage while dishing out alpha damage. You can also continue the alpha train while Critical Permeation is active, being able to deal damage and not recieve it, you will be vulnerable after however. Another top choice for a Technical Slot. |
|
 |
Quirk Factor Release Quirk Factor Release helps All Might with his cooldowns, within the 10 seconds of a dealt guardbreak you can get 2 Special Actions, 2 Gammas and fully reset your beta. One of your best choices for an Assault Slot. |
|
 |
Embrittlement Embrittlement makes All Might's melee combos do way more damage than ususal by giving enemies a -10% defense debuff. Another top choice for an Assault Slot. |
|
 |
Kota Finder Kota Finder is good because of All Might's need for levels, and his high mobility. A strong choice for a Strike Slot. |
|
 |
Reinforced Revive Reinforced Revive is good because he has an alternative way of reviving allies through his Special Action. If you have a Support Slot, this is a great option. |
|
 |
Revenge Support This is good as it can keep All Might in the fight longer, but especially when he gets the defense boost on his alpha. The other best choice for a Support Slot. |
|
 |
Acceleration It allows for some really special combos like Beta (Dash) -> Beta (Dash), makes his start for his alpha, gamma, special action and beta faster and has less endlag. One of your best choices for a Rapid Slot. |
|
 |
Card Duplication It's good because of his need of levels, you will need to play aggressive to make use of it however. Another one of your best choices for a Rapid Slot. |